So you have just bought a CenturyLink modem and need information for setting it up. In this blog, we will walk you through the process of hooking up a CenturyLink modem. It does not matter which model you have got, the process is the same. Hooking up the modem is easy and fun. Let us get right into it.
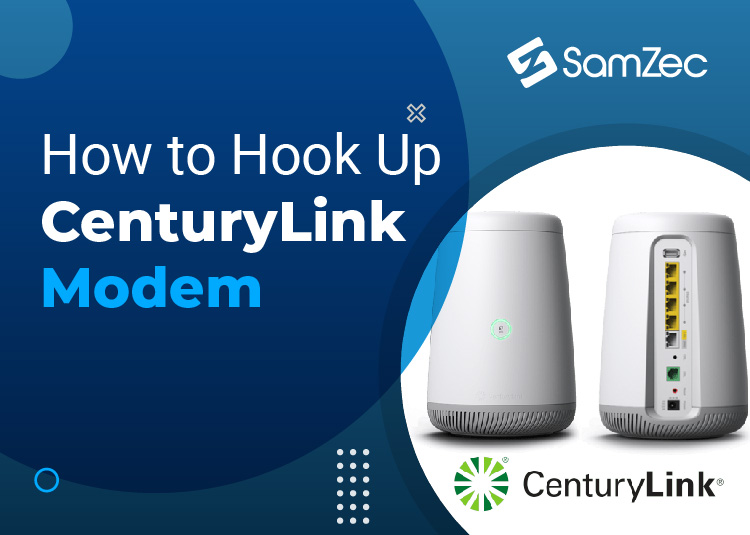
CenturyLink Modem
CenturyLink modems come in two main types: the C4000 series and the Tower modem. This guide can be utilized to install both of the modems. Hooking a CenturyLink modem is easy, as mentioned and you do not have to hire a professional who will charge hundreds of dollars for this 10 minutes task.
Install the CenturyLink modem yourself with this guide. We will walk you through every detail.
Hook Up CenturyLink Modem
Before you hook up the CenturyLink modem, you will need to prepare. First, make sure that you have everything you need. An ethernet patch cable, the modem, etc. Also, be sure to check you have an ethernet port near the place where you are installing the modem.
Moreover, you also need to have a data package on your phone. We will discuss why you need internet data on your phone in the later parts. Once you are prepared, you can start hooking up the CenturyLink modem.
Download the CenturyLink Phone App
Perhaps this step also counts as getting ready. But in any case, you need to download the ‘my century link’ phone app from the App Store or Play Store. Be sure to type in the same words in App Store or Play Store and to download the authentic application and not any spams software.
Once you have successfully downloaded the application, you can open it and unfollow the guidelines. Set notifications, permissions, etc.
Boot Up the Modem
Now at this point, you have got the modem, and you have got the phone app, let’s proceed further. Open the modem box and take the modem and the power plug out. Connect the power plug into a power socket and connect the other end of the cable to the modem.
Right after connecting the power cable, you should see the power light. Once the power light is on, the other lights should also flash. This can take some time when the modem is booted for the first time. But it should not take longer than 4 minutes. If there is only a single power light on the modem you have bought, you do not have to worry about it. Proceed with the next steps.
If there are multiple lights on your modem, you will notice at least one red light flashing. Again, you do not have to worry about this red light because at this stage you have not connected your modem with the ethernet link. It is indicating a lack of a link between a server and a client and it will flash green once you are connected to the internet.
Setting Up
Alright. You have connected the modem with the electrical power, it is booted and now it’s time to connect the ethernet cable. The CenturyLink modem sometimes comes with an ethernet patch cord. If yours hasn’t you will have to buy one. If the package includes an ethernet cable, let’s connect it with the ethernet port on the wall.
Some people get confused here as to which side of the ethernet patch cable to insert into the port and which side into the CenturyLink modem. You need to know that it does not matter. The ends of the ethernet cable are called RJ45 connectors or male plugs which are both the same on an ethernet cable.
Once you hook up the modem with the ethernet cable to the ethernet port, you will need to set up your WiFi.
Set Up WiFi on CenturyLink Modem
Setting up WiFi on your modem is very important. Because you connect your laptop and computer to the router using ethernet cables but you cannot connect your phones and tablets. WiFi is also a more convenient connection to use. You can use it indoors, outdoors, and basically from anywhere in its range. And CenturyLink Modem can transmit signals in a quite large radius.
Moreover, it is a much better option if you choose to use WiFi on your laptop and all the other devices that are compatible because ethernet patch cables will make the interior of your space untidy and bulky. In any case, here is how you set up the WiFi.
Setting up the WiFi on the CenturyLink Modem is way more simple than you would imagine.
First, open the CenturyLink phone app and find the barcode scanner. Open the barcode scanner and scan the code underneath the modem. Once you scan the barcode, it will give you further directions to change the login username and password. You will also get the option to set a password and username for network SSID which is essentially your WiFi connection. On the homepage of the application, you will find the options to pay your internet bill and other information.
Finishing Up
Once the modem is in place and you can access all of its features from the CenturyLink phone app, the hooking-up procedure is almost complete. Now what you need to do is to test the WiFi and the ethernet connection. Remember you can always change the settings from within the app, e.g. how many users can connect, the password, which sites to allow and which not to allow, etc, etc. Be sure to change the password once every month to stay safe. And finally, you have hooked up your CenturyLink Modem and you can access both ethernet and WiFi internet now.


