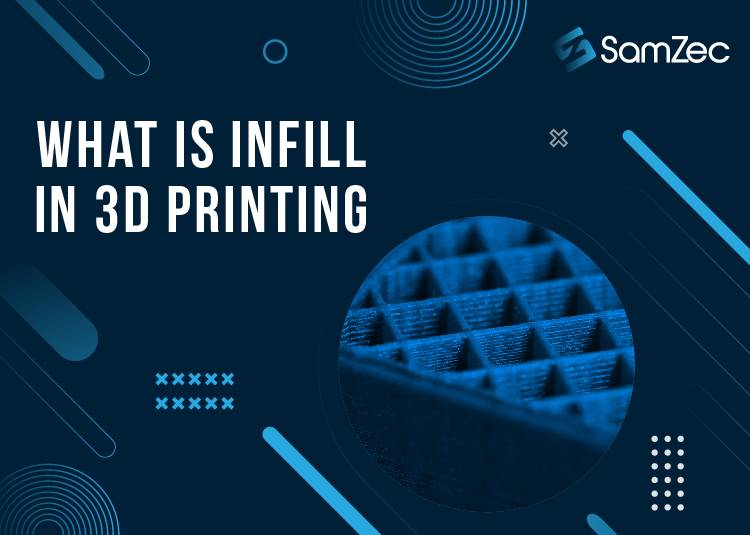
Infill is one of those terms that you’ll hear a lot if you watch any sort of architecture or construction shows on TV. It’s also something you might hear if you’ve done any sort of reading about new construction methods. But what is infill in 3D printing? And what does it mean?
Guarantee Quality of Your 3D Prints
Even while printing, some 3D objects require additional internal support. This is critical because the infill ensures that the print quality is maintained.
When designing a model with numerous interior overhangs that your 3D printer cannot print over, infills are required. This is because infill gives your model support while new layers are added on top of it. That’s why you must have to know about What is Infill in 3D Printing.
Read more: Top 5 Best Resin 3D Printer for Miniatures in 2023
Infill Percentage
The amount of filament to be used, the final product’s strength, and the length of time it takes to print are all determined by the infill percentage. This number can be anywhere between 0 and 100. In most slicer software, such as CURA, the default infill percentage is set between 18 and 20%. These settings can be changed, depending on the desired strength of the final 3D print.
Infill Patterns
The infill pattern you choose has a direct impact on the final print’s cross-sectional appearance. Pre-defined infill patterns are built into the slicer software. Because some designs are popular, they are pre-installed in all slicer software.
Popular infill patterns include the triangular, honeycomb, wiggle, grid, and rectangular patterns. These various patterns offer a one-of-a-kind combination of flexibility, strength, and filament efficiency.
What Are the Different Infill Types?
You have a variety of infills to choose from, and the best way for me to explain them is to give you some examples of how you might use them and to explain the role of infill in 3D printing.
Infill for Models and Miniature Figurines
3D prints intended for use as figurines or models do not need to be particularly robust, with infill density ranging from 0% to 15%. The reason for this is that they are rarely put under a lot of stress or subjected to a lot of heavy handling, and their strength is usually sufficient because they are small. In this case, zig-zag or lines are the most popular infill patterns because they are easier to print.
Functional 3D Prints
When designing practical 3D prints that require strength in multiple directions, these infill patterns are ideal. DIY projects, auto parts, brackets, bridges, and other items fall into this category. The infill density of these 3D prints is typically greater than 50%, with patterns such as;
Cubic: This pattern, which is made up of tilted and stacked cubes, is ideal for honing your 3D printing skills.
Octet: This pattern consists of stacks of pyramid shapes that provide adequate strength in all directions.
Cubic subdivision: This is a slightly different version of the cubic 3D pattern, as it includes tiny cubes within the 3D object. As a result, strength is provided in every direction while using less filament.
Gyroid: This three-dimensional pattern resembles waves and is ideal for an object that will be stressed in a variety of ways. It’s also tough in a variety of ways.
Quarter cubic: This infill pattern is similar to the octet, with the exception that the pyramid shapes are offset from the other half. It’s a great pattern because it adds strength to the entire 3D model.
Flexible 3D Prints
Infill on flexible 3d prints is a fascinating topic because it has a significant impact on the final print’s flexibility. Flexible materials allow you to fine-tune how much and in which direction your print flexes by using infill.
This infill pattern’s infill density ranges from 0% to 100%, with the percentage chose depending on how “spongy” the final 3D print needs to be. The following are some examples of flexible material infill patterns:
Cross: The spaces between the grids and crosses in this 2D pattern allow for twisting and bending. In addition, the grids in this infill pattern resemble imaginary crosses.
Cross 3D: This infill pattern differs from the cross in that the lines begin to move at inclines as the print grows larger. As a result, a more rigid and sturdier 3D object is produced.
Which CURA Infill is the Best?
CURA is the most popular 3D printing slicer, and it comes pre-loaded with a variety of infill patterns. There are so many to choose from that deciding which one to use can be difficult!
While each type of infill has its own set of benefits and drawbacks, the honeycomb or hexagon infill stands out among the CURA infills. This is because the infill ensures that the filament is used efficiently while still ensuring a strong build quality.
The honeycomb pattern can be found in both nature and engineering, and bees instinctively understand that it is the ideal combination of material use and strength. It’s also for this reason that 3D experts recommend it as the preferred infill. Furthermore, not only does this pattern save time and filament, but it also evenly distributes strength in all directions.
Nonetheless, the honeycomb pattern necessitates a lot of direction changes from the print head, which is a challenge you’ll have to overcome, especially if you’re using bulky print heads. This can cause a slower print speed as well as a messier print. Despite this disadvantage, many 3D professionals prefer to use this infill pattern.
Conclusion
You now know what an infill is and how important it is in 3D printing after reading this article. You’re also aware of the various infill patterns available, each of which offers a unique combination of strength, filament savings, and flexibility.
It will be much easier to choose an infill that best meets your needs if you keep this in mind. How can you print faster? Get More Infill! If you’re wondering what is infill 3d printing, this is everything you need to know about infill in 3d printing.


